This guide contains a step-by-step guide on how to create your first terrain with vegetation rendered by Nature Renderer.
- Import Nature Renderer
- Create a terrain
- Enable Nature Renderer
- Add vegetation to your terrain settings
- Place vegetation on the terrain
- Enable wind
- Tweak Nature Renderer settings
Step 1: Import Nature Renderer
If you don't already have Nature Renderer then download the free trial or purchase Nature Renderer first.
To import the Nature Renderer package, either import the .unitypackage file that you downloaded, or import the package from the package manager if you purchased Nature Renderer on the Asset Store:
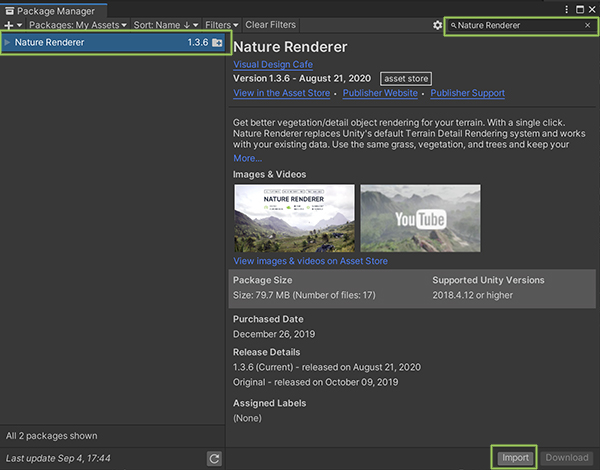
- Open Window > Package Manager from the menu in the Unity editor.
- Select "Packages: My Assets" in the top-left corner of the window, this will show all the assets that you purchased on the Asset Store (default selection is either "In Project" or "Unity Registry").
- Search for "Nature Renderer" in the search field on the top-right of the window.
- Select Nature Renderer from the list and click Import in the bottom-right.
Step 2: Create a terrain
Nature Renderer works by replacing the detail rendering system for Unity's terrain. To be able to use Nature Renderer you first need to add a terrain to your scene. If you already have an existing terrain then you can skip this step.
- Go to GameObject > 3D Object > Terrain to create a new terrain in your scene. This will create a new Game Object in your scene with a Terrain component. You can use (select) this Game Object to edit the terrain.
For more details on Terrains see the Unity documentation.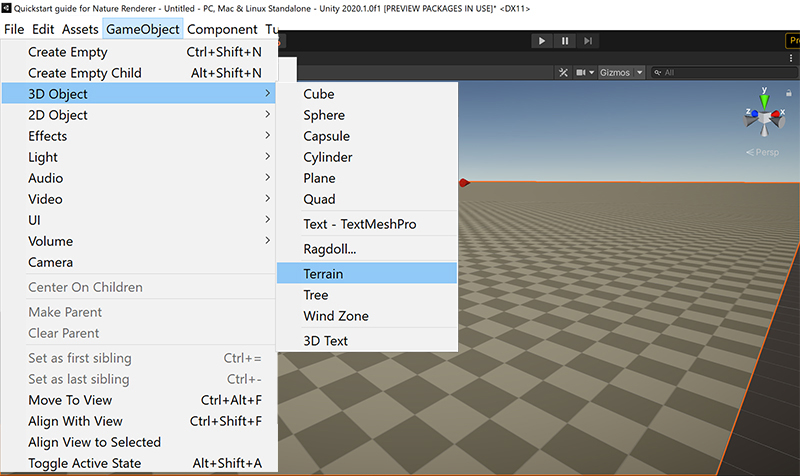
Step 3: Enable Nature Renderer
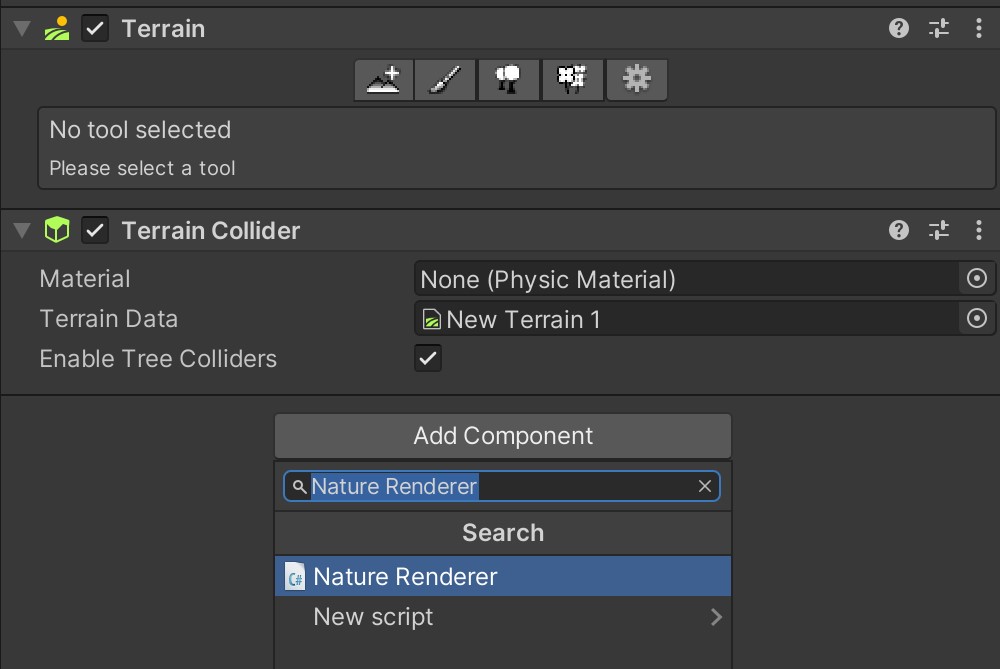
- Select the terrain Game Object in your scene.
- Click Add Component at the bottom of the inspector.
- Type "Nature Renderer" to find the Nature Renderer component and click to add it to the terrain.
- Nature Renderer will automatically replace Unity's terrain rendering system. You can leave all the settings at the default values for now.
Step 4: Add vegetation to your terrain as detail objects
Vegetation needs to be added to the terrain settings as detail objects before you can place or render anything on the terrain.
- If you already have detail objects added to your terrain then Nature Renderer will automatically load the ones that were already added.
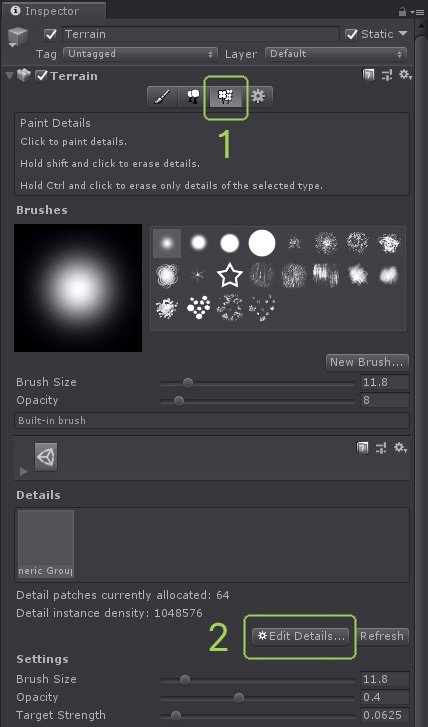
- If you don't have vegetation added to your terrain settings yet then you can add new detail objects. Go to the Paint Details tab and click Edit Details... > Add Grass Texture or Edit Details... > Add Detail Mesh. This will add a new detail object to the terrain's list of available detail objects. Later you can select a detail object from this list to place it on the terrain.
Edit Details... > Add Grass Texture
A grass texture is a simple 2D image of grass. Nature Renderer will automatically generate a 3D mesh, load a default material, and assign the image to the mesh as a texture. This option requires no setup, but provides very limited control over the render settings and mesh that is generated.
Select a texture in the Detail Texture field and click Add to add the new detail object to the terrain settings.
See Detail Settings for more settings that you can change for the object.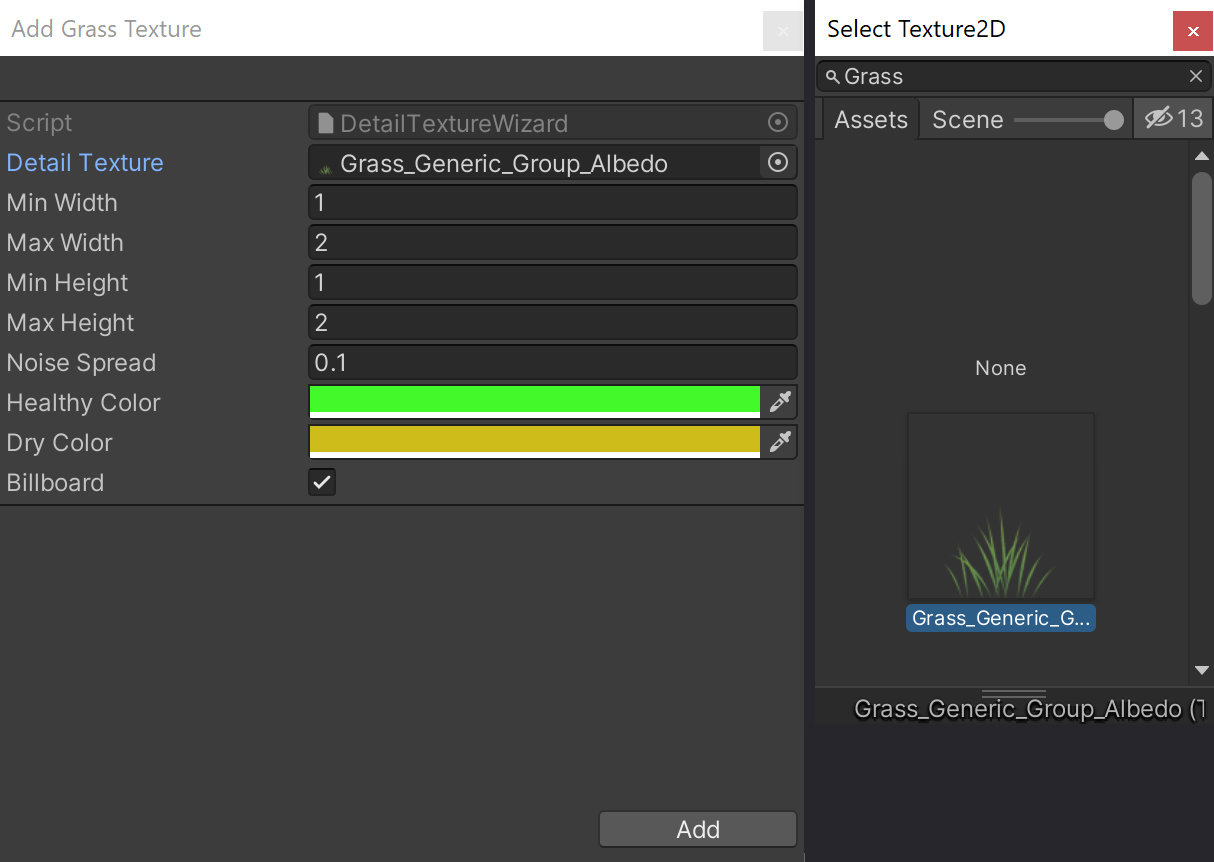
Edit Details... > Add Detail Mesh
Adding a detail mesh will load the mesh, material, and textures from a prefab in your project. This gives most control and best results, but requires you to create your own meshes, materials, and prefabs.
Select a prefab in the Detail field and click Add to add the new detail object to the terrain.
Prefabs require a Mesh Renderer or LOD Group component on the root. The prefab's position should be set to 0,0,0 to prevent detail objects from having an incorrect offset.
See Detail Settings and Render Settings for more settings that you can change for the object.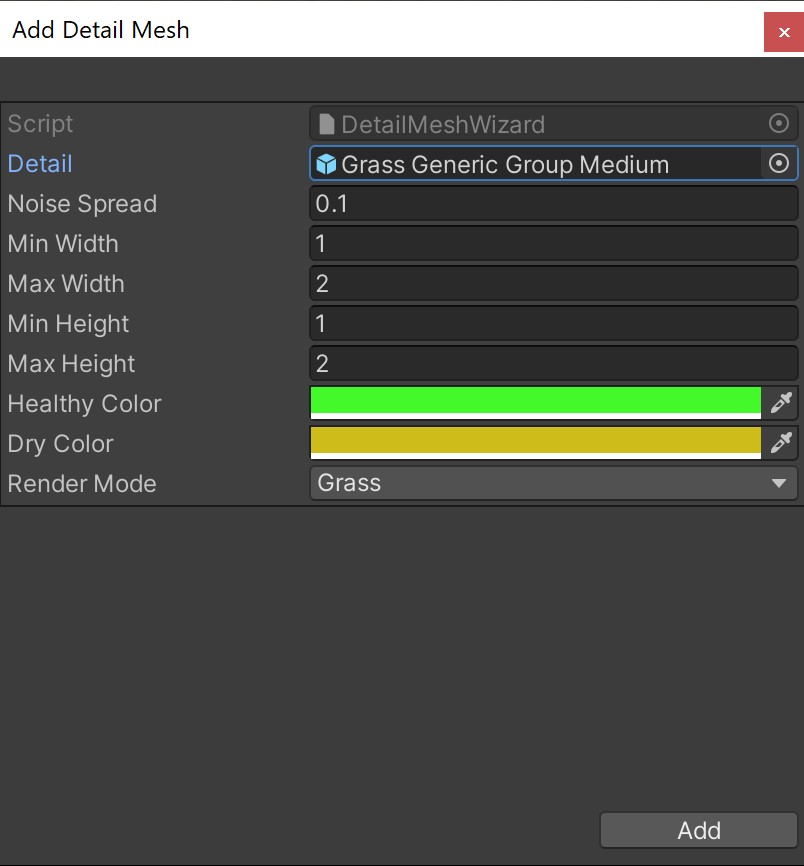
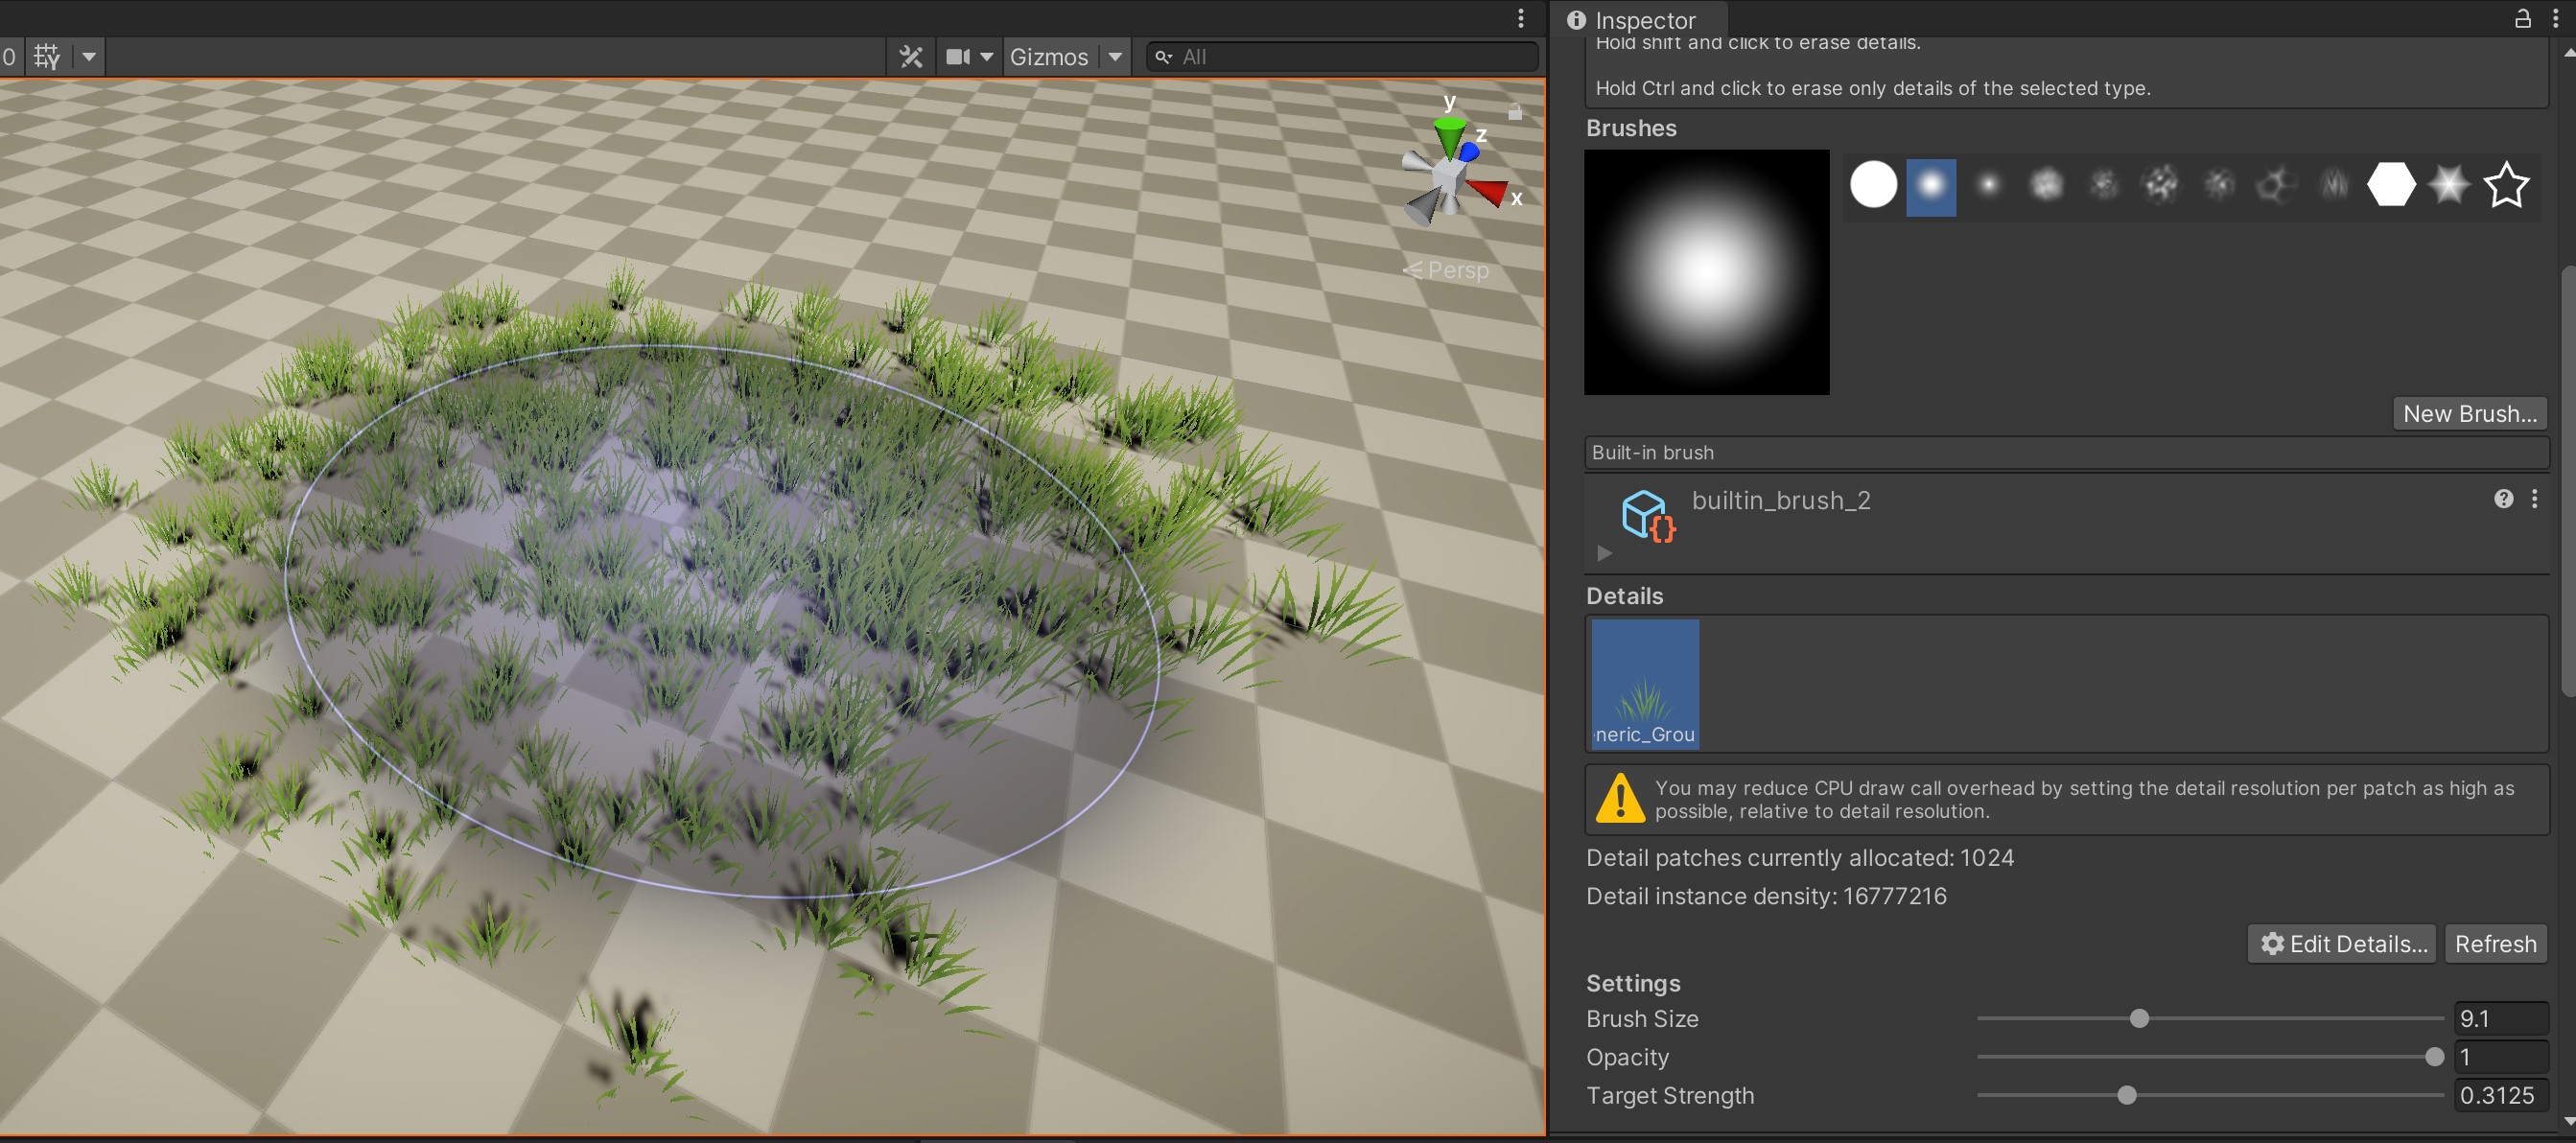
Step 5: Place vegetation on your terrain
- Go to the Paint Details tab.
- Select a detail object from the list of detail object's in the terrain component. The selected object is the one that will be placed on the terrain.
- Select the Brush Size, Opacity, and Target Strength that you want to use to place the detail object on your terrain.
Brush Size - The size of the brush that you use to place detail objects on the terrain.
Opacity - How fast detail objects are placed on the terrain, up to the density set by the target strength.
Target Strength - The density that you want the detail object to have. Higher target strength results in more dense vegetation.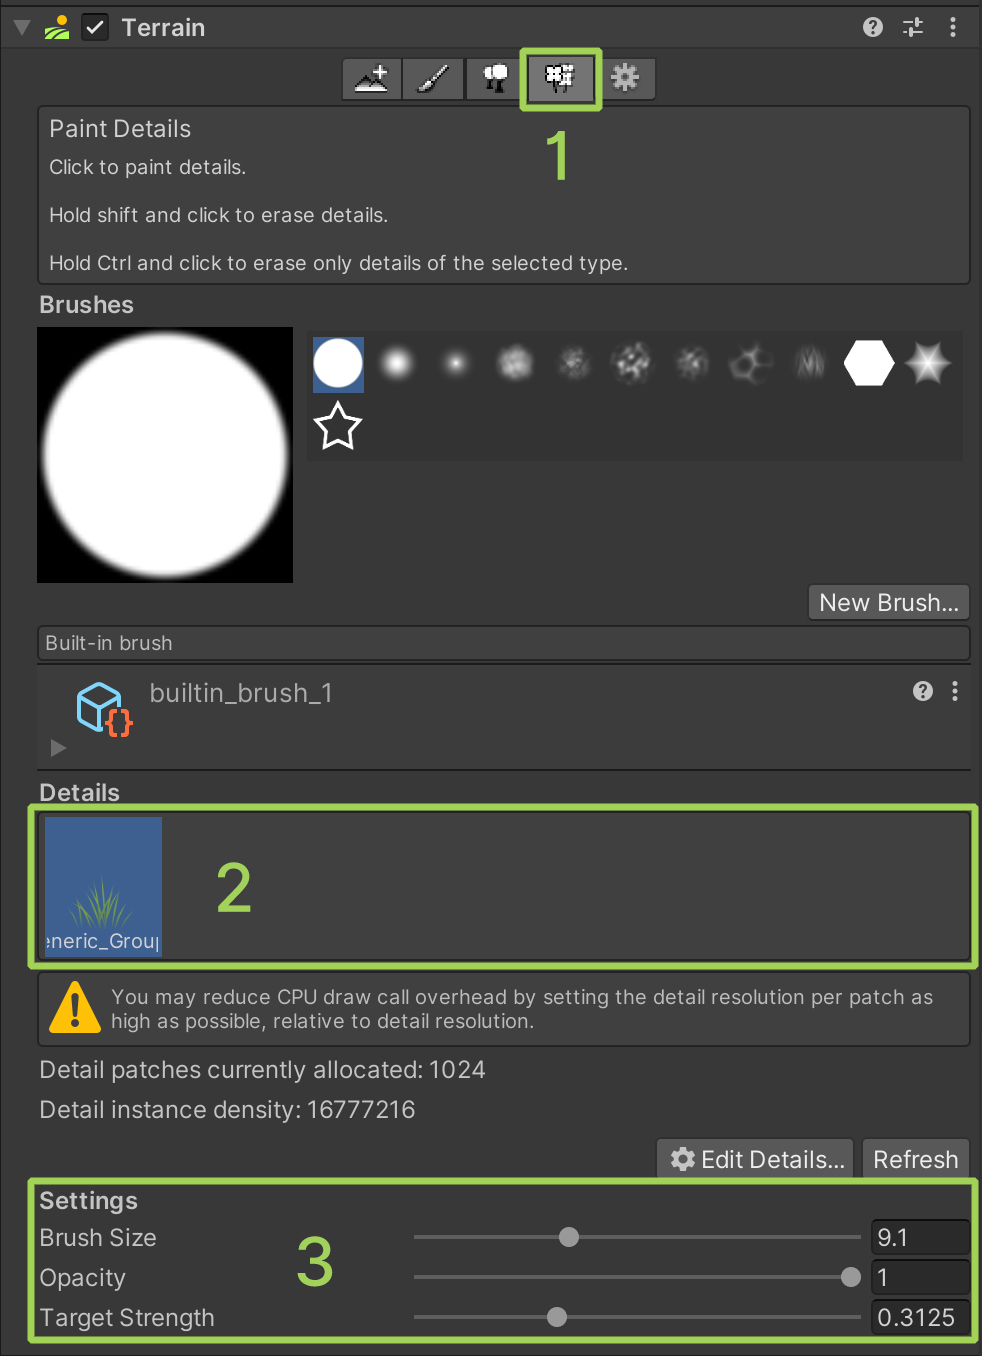
- Click anywhere on the terrain to place detail objects within the brush radius. Hold Ctrl and click anywhere on the terrain to erase detail objects.
Step 6: Enable wind
The Nature Shaders that come with Nature Renderer support wind animations. All detail objects that were added as 2D grass textures use Nature Shaders by default. Detail objects that were added as detail meshes need to use Nature Shaders for their material(s).
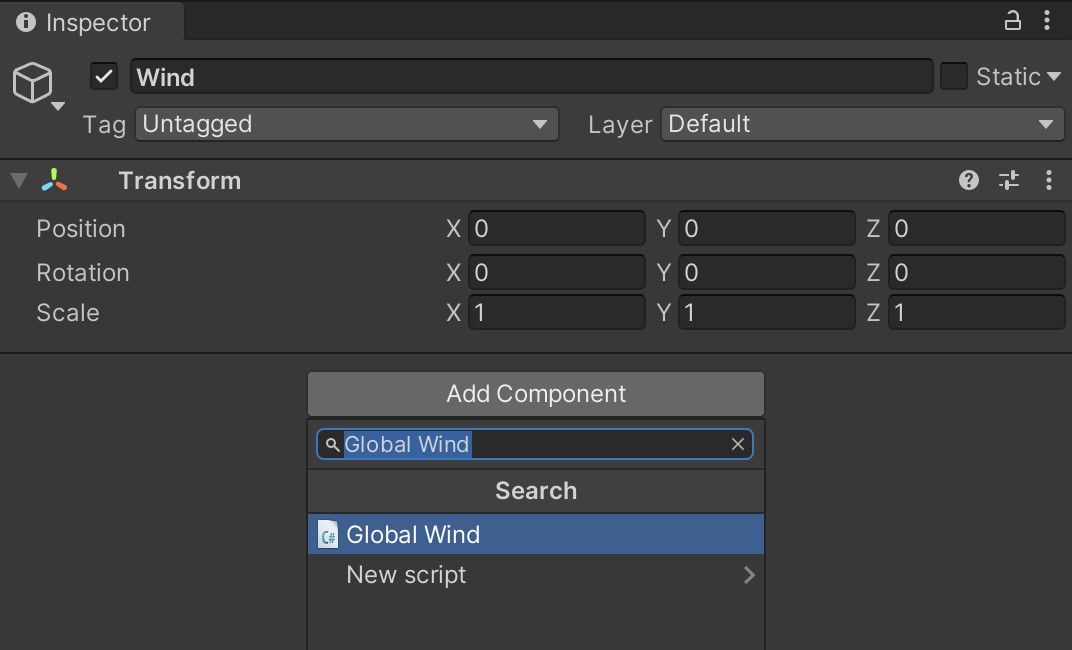
- Create a new Game Object in the scene.
- Select the Game Object and click Add Component in the inspector to add a new component.
- Select "Global Wind" in the Add Component menu to add the Global Wind component to the game object and enable wind in the scene.
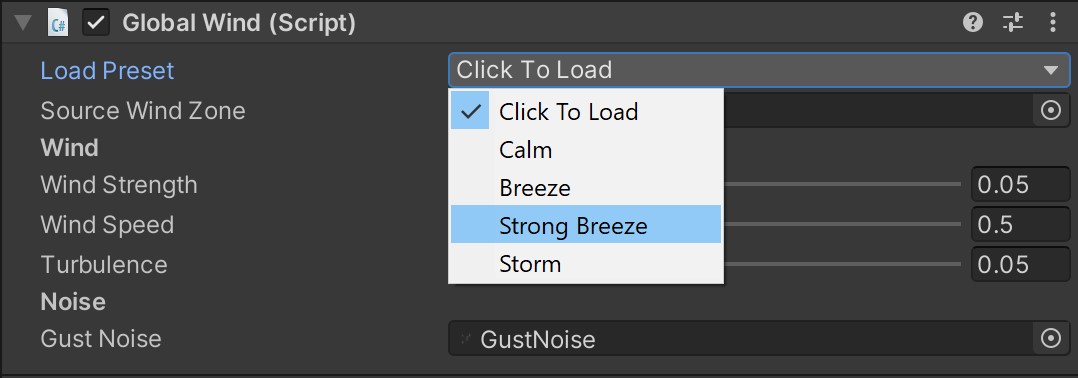
- Select a wind preset from the Load Preset drop-down. Or drag the sliders to adjust the wind strength.
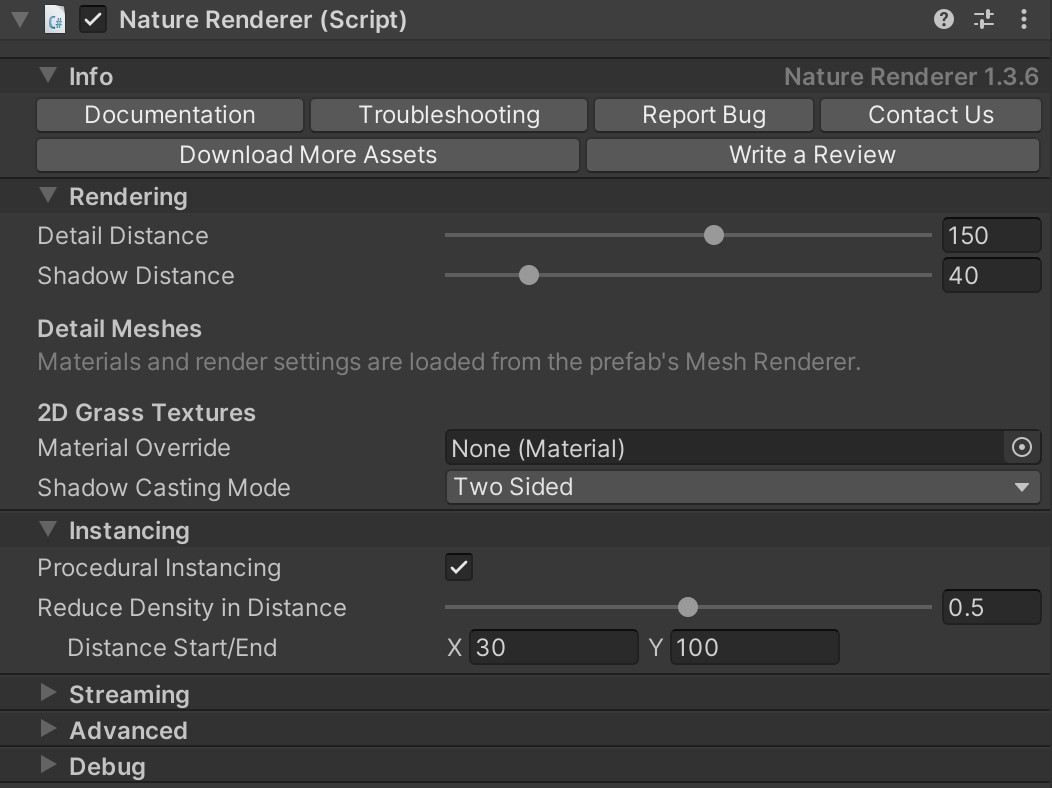
Step 7: Tweak Nature Renderer settings
Detail Distance:
The maximum distance at which detail objects are rendered. Detail objects with a LOD Group component will use the culling distance set in the LOD Group, if that distance is less than the maximum distance.
Shadow Distance:
The maximum distance at which detail objects cast shadows. This can be set at a lower value than the shadow distance in the project settings to improve performance.
Material Override:
The material to use for detail objects that were added using 2D grass textures. If no material is set then a default internal material is used with the "Nature Shaders/Grass" shader.
Shadow Casting Mode:
Determines if detail objects that were added using 2D grass textures should cast shadows.
Procedural Instancing:
A faster rendering method that leverages the GPU and compute shaders. You need to add support to your shaders for it to work. All the shaders that come with Nature Renderer support this by default (Nature Shaders).
Reduce Density in Distance:
Reduces the density of detail objects when they are far away from the camera. Useful to improve performance.